> ## Documentation Index
> Fetch the complete documentation index at: https://connectifyai-39.mintlify.site/llms.txt
> Use this file to discover all available pages before exploring further.
# Quickstart
> Learn how to use ConnectifyAI.
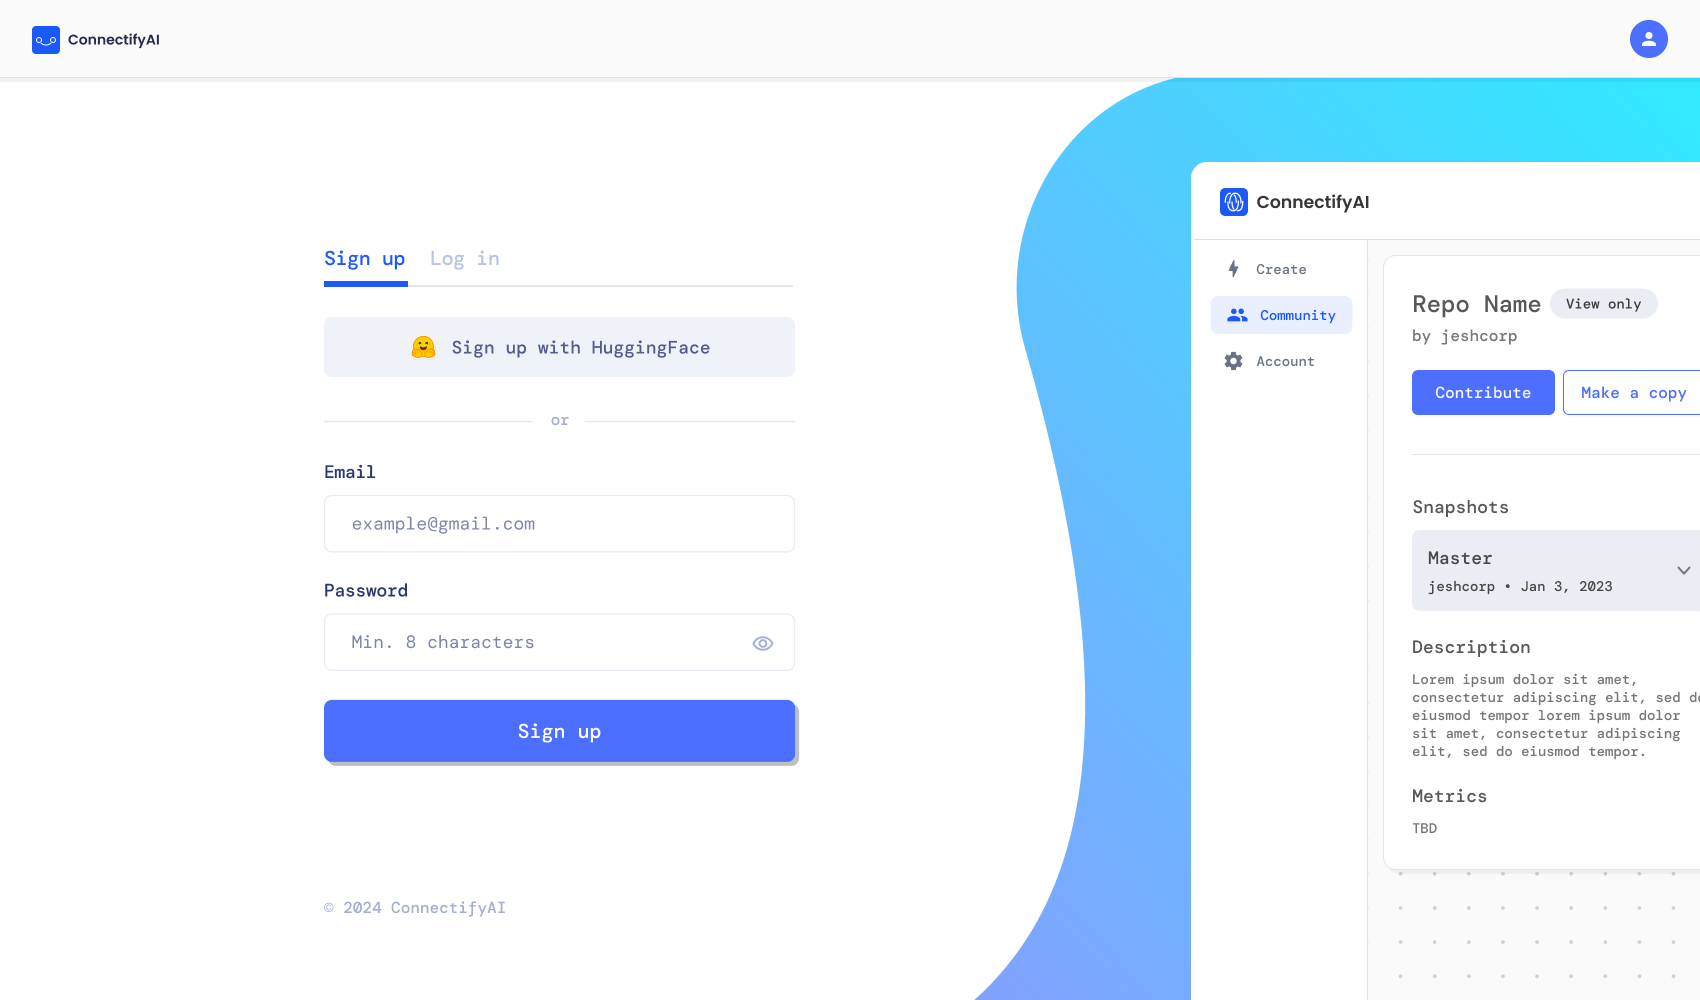
## Create an account
First step is to visit the website and create an account.
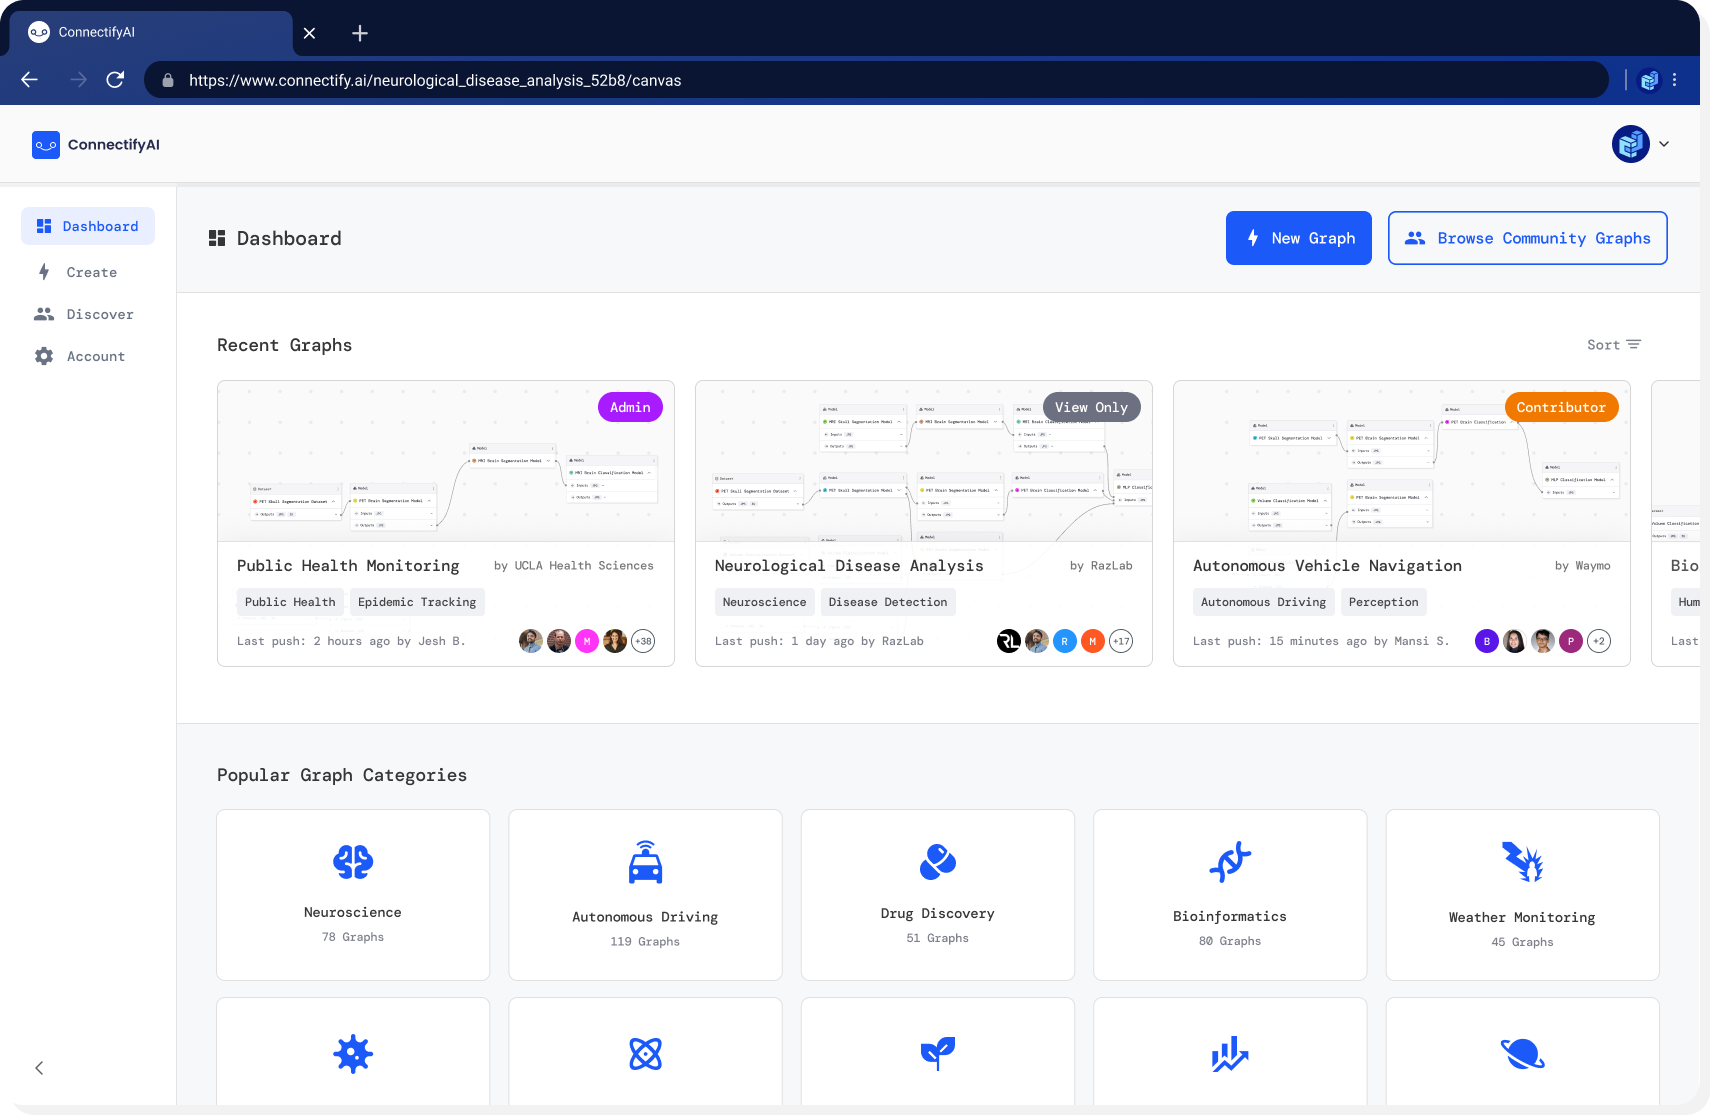
 ### Create or load a graph
After creating an account you will be able to either create a new graph or load
a community graph.
### Create or load a graph
After creating an account you will be able to either create a new graph or load
a community graph.
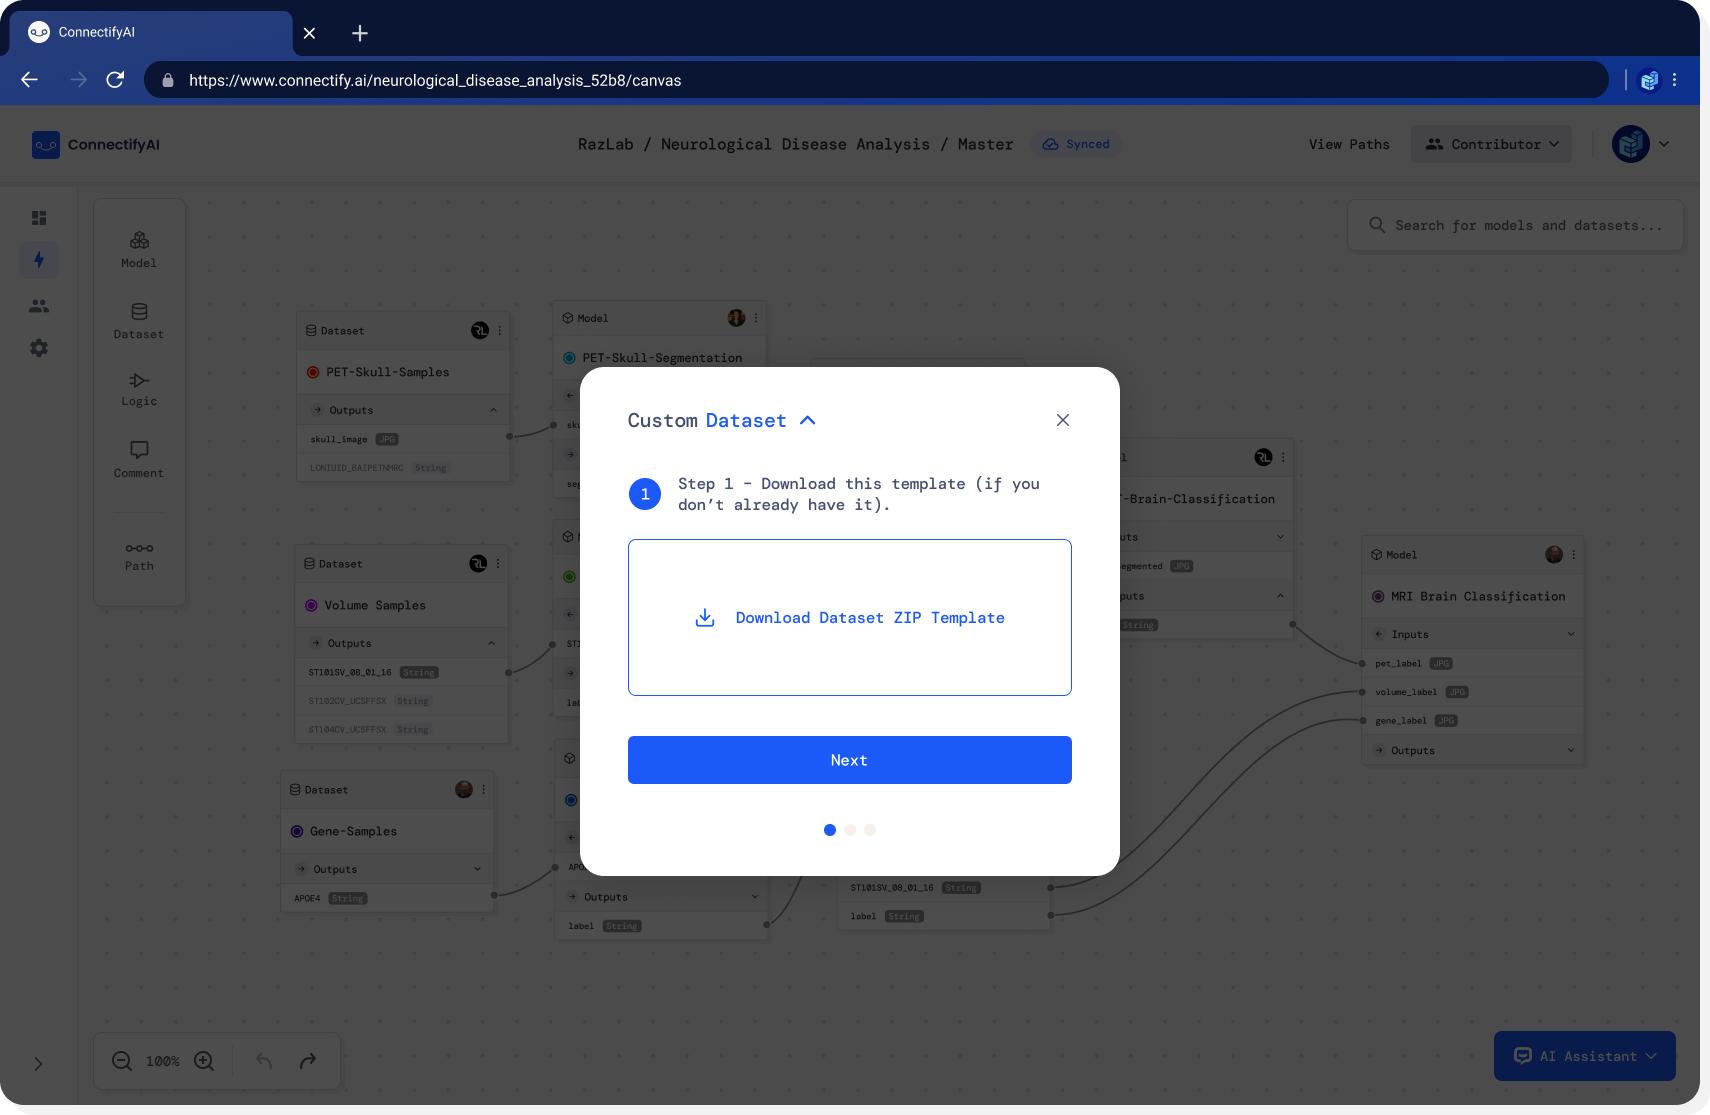
 ### Adding to a graph
Once you have clicked on a graph it will be displayed along with all of its previous components.
### Adding to a graph
Once you have clicked on a graph it will be displayed along with all of its previous components.
 Now you will be able to make changes to the graph
by adding new models/datasets. In order to add new models/datasets you will first
need to download a ZIP template and modify it.
Now you will be able to make changes to the graph
by adding new models/datasets. In order to add new models/datasets you will first
need to download a ZIP template and modify it.
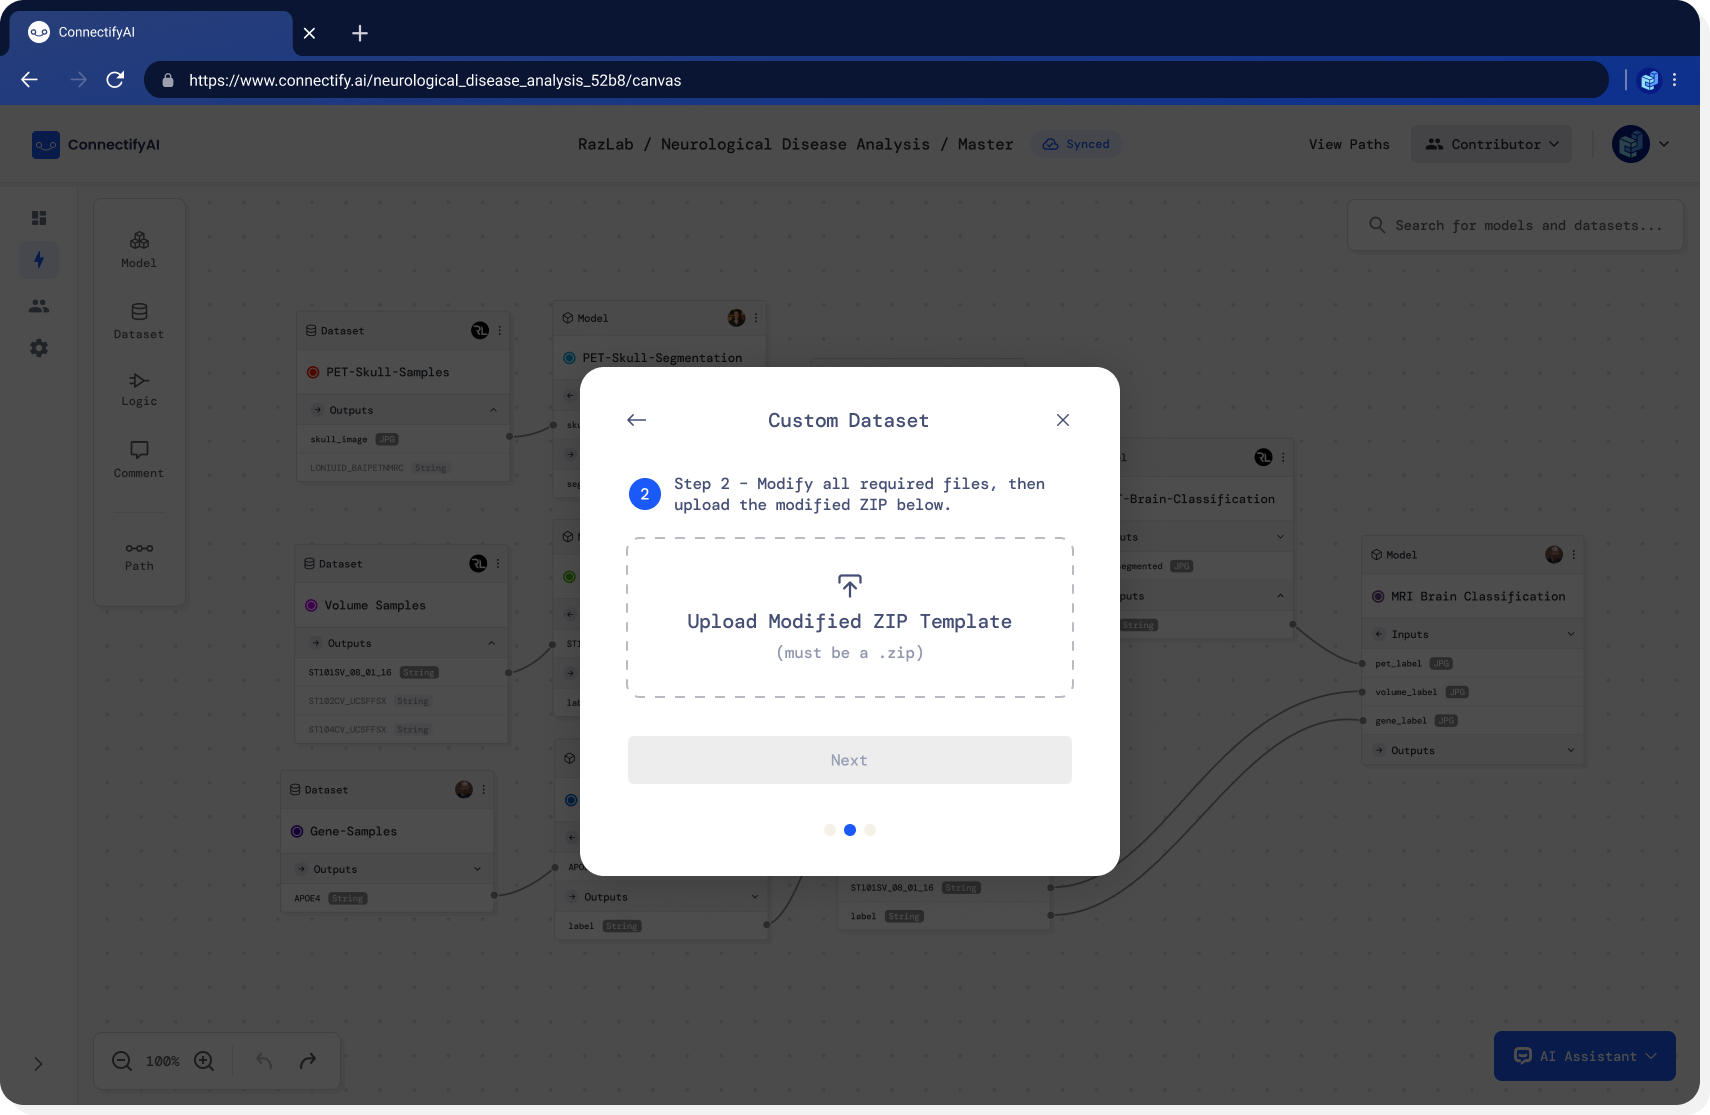
 After you have made changes to the template you can upload it.
 Then you will have to fill in basic information about the model/dataset.
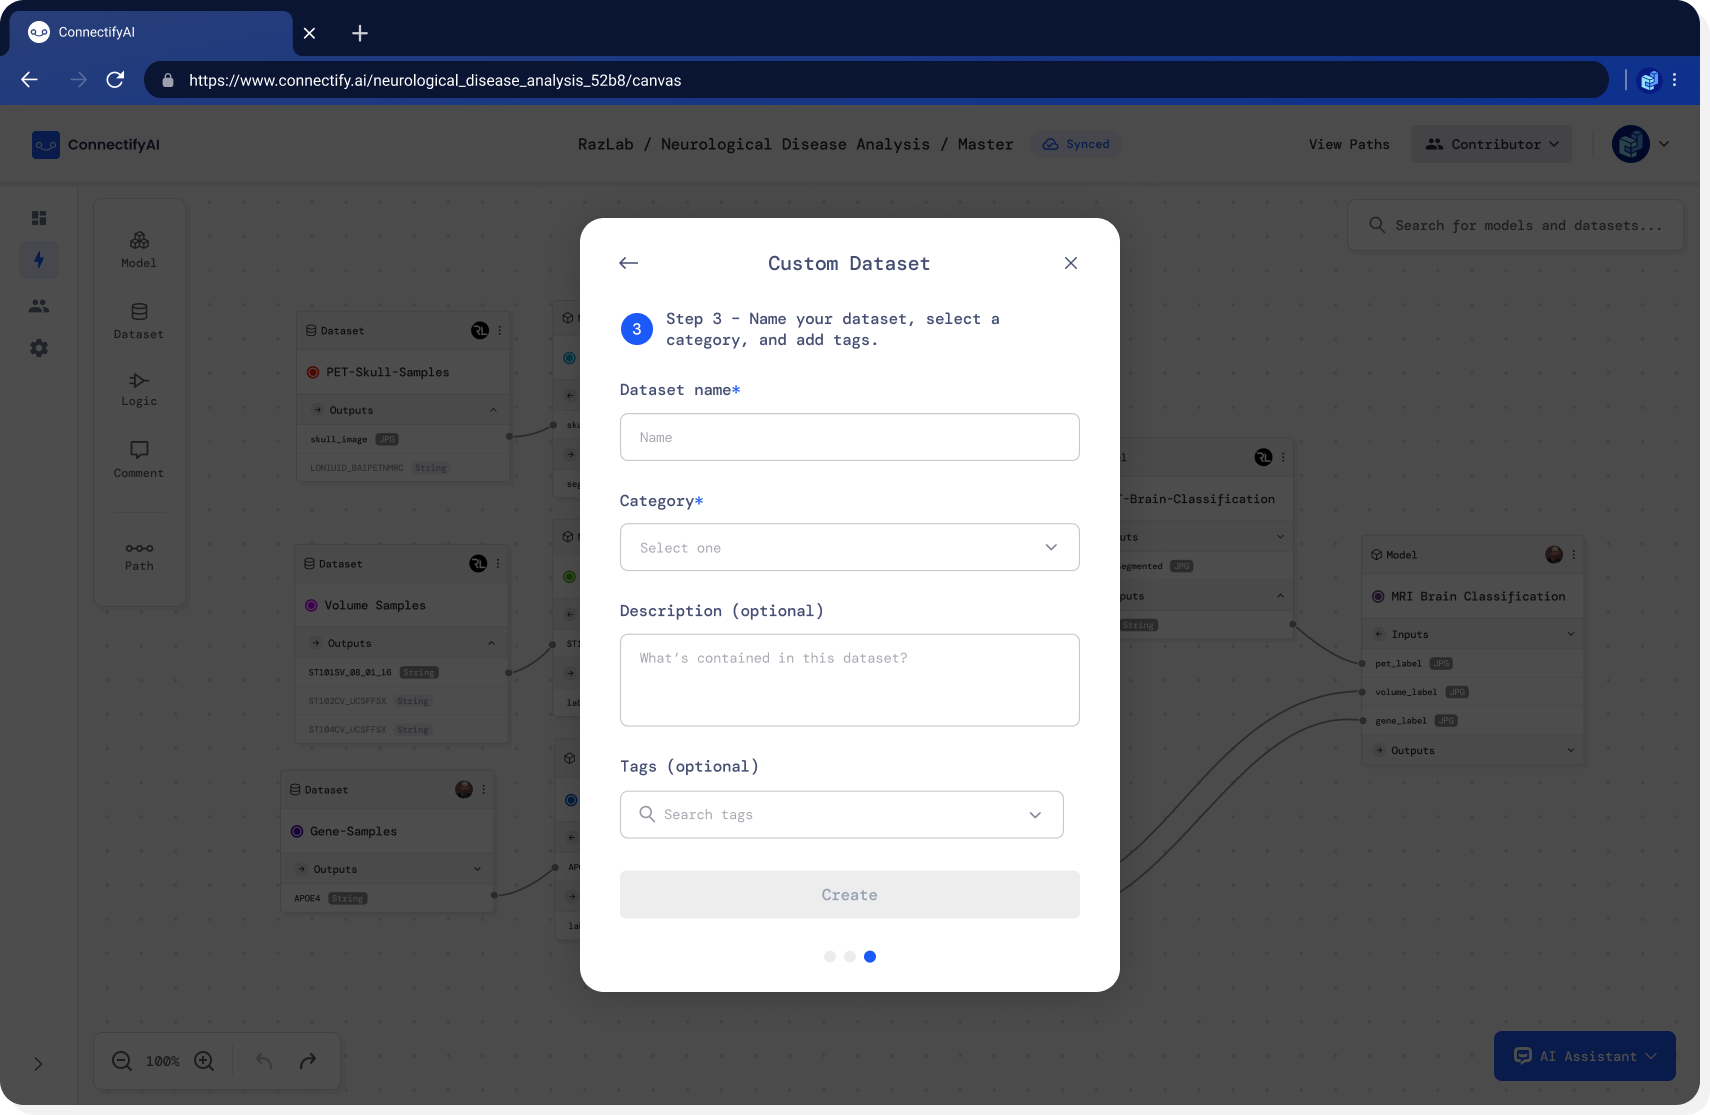 Instead of uploading a model/dataset you can also choose a pre-existing one. If you choose to do so you will be able to search for models and add it to the graph.
 Once you have made all the changes you want
you should commit these changes to save it for later.
Once you have made all the changes you want
you should commit these changes to save it for later.
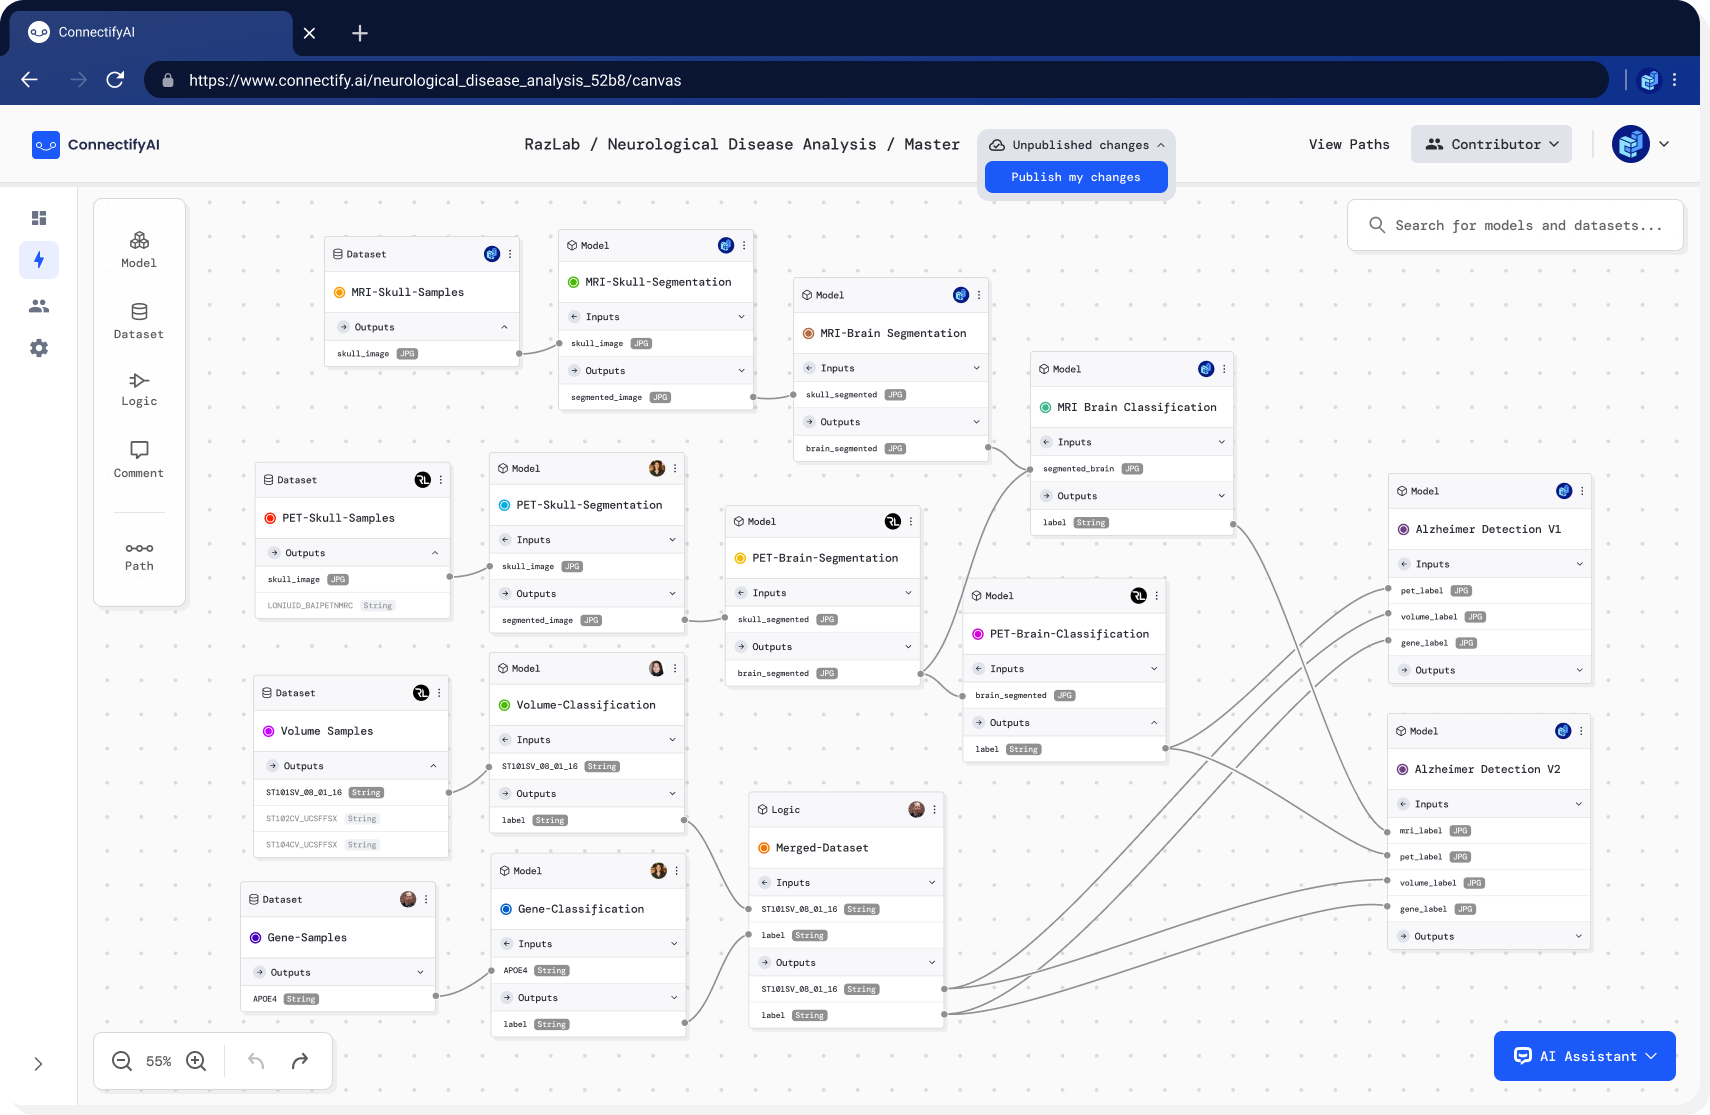 When publishing changes you will have to write a commit title. Optionally you can also write a description of what the changes were.
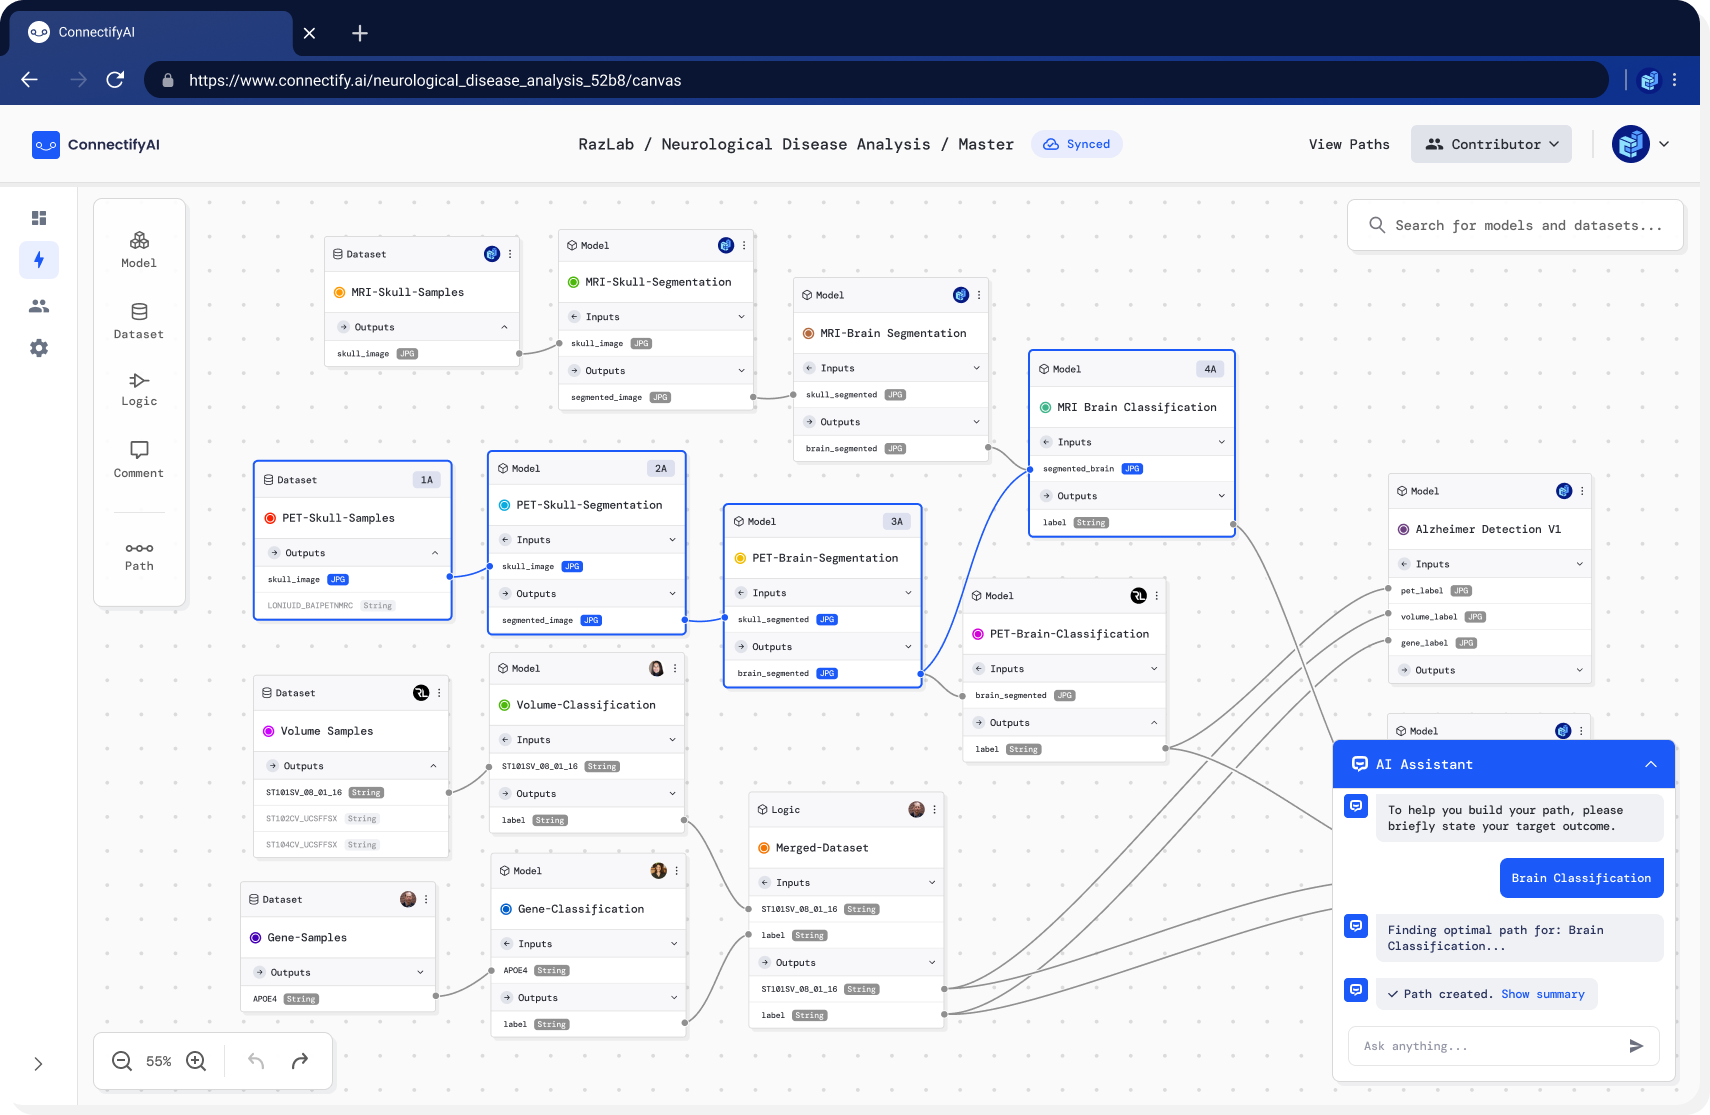
.png?fit=max&auto=format&n=FIPf6TGp2g0fkLmt&q=85&s=05ffa8c982f4ee29b9d9d69fd0ef7cae) ### Running a path
In order to run a path you can select multiple models and datasets and save the path.
If you do not know what path you want to run but know where you want to start and end the path you can
select two models/datasets and use our AI tool to find an optimal path. This AI tool uses metrics from previous
experiments to find the best path for you.
### Running a path
In order to run a path you can select multiple models and datasets and save the path.
If you do not know what path you want to run but know where you want to start and end the path you can
select two models/datasets and use our AI tool to find an optimal path. This AI tool uses metrics from previous
experiments to find the best path for you.
 You can also see previous paths which have been ran and see the metrics in order to choose a path.
.png?fit=max&auto=format&n=FIPf6TGp2g0fkLmt&q=85&s=c081a5717c6a8756e6342cf663a6d17d)